Storm Door Hinge Rail Shim

Larson 146fv Storm Door Hinge Rail Replacement Screen Handle Home Depot Deadbolt Doors Hinges Eastcoastrapist Com
Https Parts Andersenstormdoors Com Resources Instructionguides 623704 Pdf

Wood Screen Door Hardware Larson Storm Hinge Rail Replacement Deadbolt Latch Template Installation Instructions Doors Hinges Eastcoastrapist Com
Https Parts Andersenstormdoors Com Resources Instructionguides 620547 Pdf

Hinge Rail 34812 Larson Storm Doors Reviews Door Handle Installation Changing From Screen To Glass Latch Template Hinges Eastcoastrapist Com
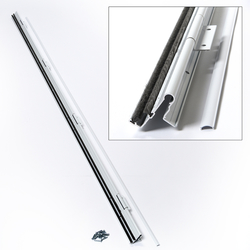
Hinge Rails
Andersen is committed to helping you find parts quickly and easily for your andersen and or emco storm doors.
Storm door hinge rail shim.
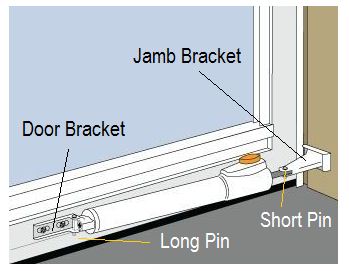
Closer Care Maintenance Andersen Emco Storm Doors
Http Pdf Lowes Com Installationguides 096829908399 Install Pdf

Storm Door 2 1 4 Shim
Https Www Homedepot Com Catalog Pdfimages 6d 6ddaef76 8e17 441b 99f7 275ceb2bc2a4 Pdf
Source : pinterest.com
